
This time it’s a renovation project for a customer’s house.
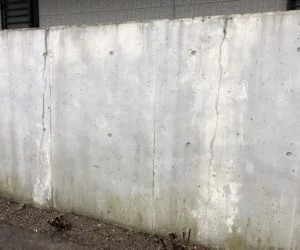
↓The paint from about 15 years ago was peeling off, and black stains and cracks were conspicuous overall.

Let’s start repairing.
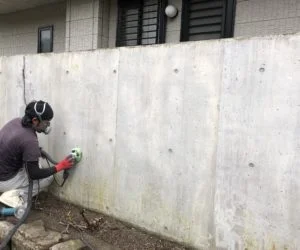
First, carefully cure the area around the construction site.
Polish the base material of the construction site with a flat polishing Level Grinding Wheel #36.
Polish the whole to remove the weak parts of the original paint.
↓Paint film floating
↓ Polishing process


Next, repair Pinholes and Honeycombs with Repair Resin.
Tips : Make sure to flatten or sharpen the corners so that the finish is beautiful
Scrape off excess material and shape.


At the same time, we will repair cracks and chips.
For cracks, fill with 2-liquid curing resin mortar after V-cut.
For chips ⇒ We will mold with a two-liquid curing resin mortar.
After removing the paint film, polishing, and repairing the base, clean the dirt and dust with a high-pressure washer and cure it again.
After that, the 4-layer process is applied with a roller or brush in order of primer, hydrophobic material, intermediate coating, concrete pattern restoration drawing, and top coat material.
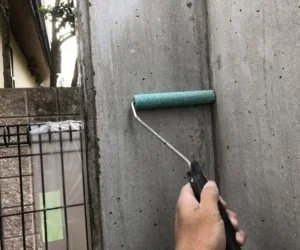
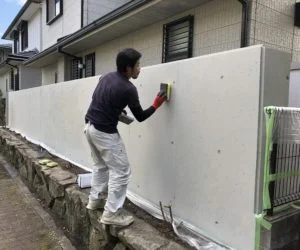
Each step requires time to dry, so we work skillfully.
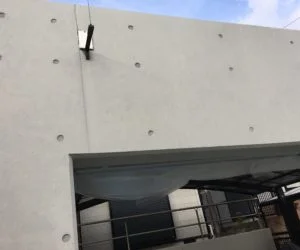
This is what it looks like when it’s finally dry.
It’s been fine for about 20 years now.

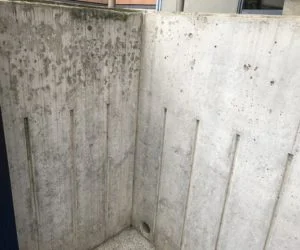
Other places Before and After


Thanks for reading this blog.
If you have any questions, please contact us.
Leave a Reply