Method
1, Before treatment
How the surface looks before treatment.
2, Grinding the uneven surface
Use a diamond cup wheel or a Level Grinding Wheel to make the repairing surface down to the same level as the surroundings. *Make sure there are no bumps.
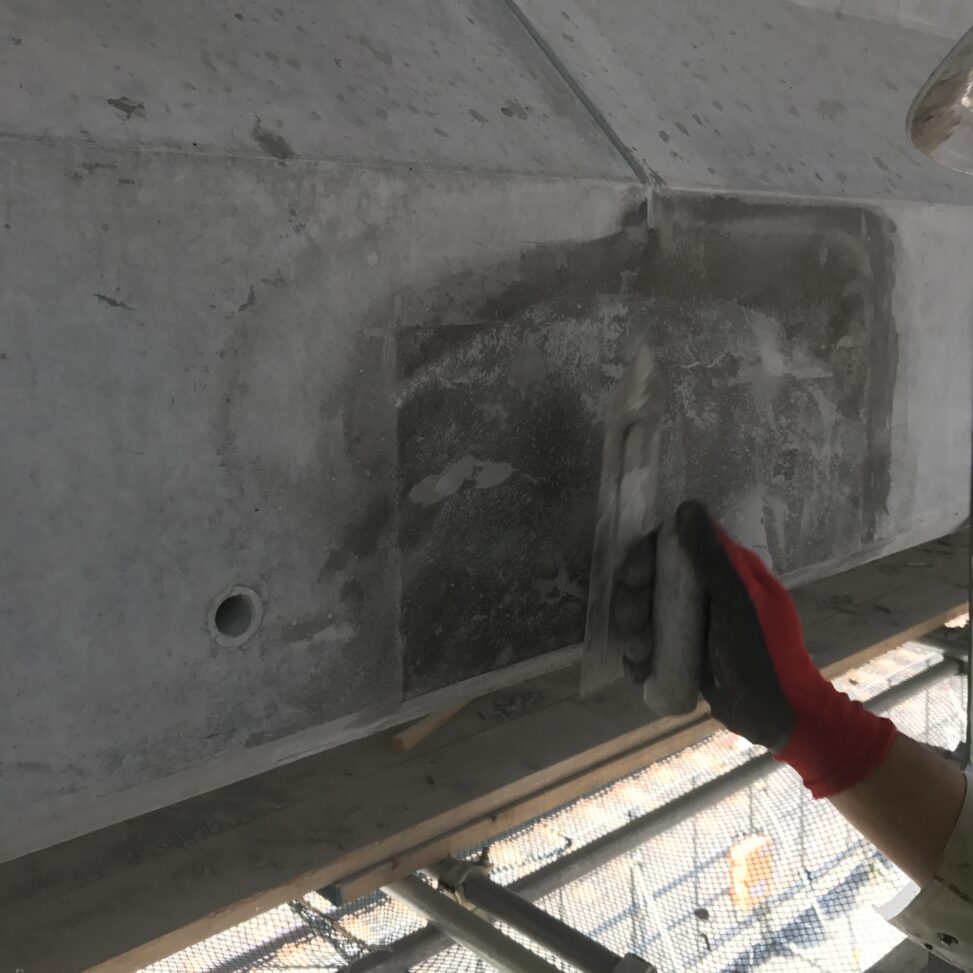
3, Repair material treatment
Apply Repair Resin and cover the whole repairing area. Make sure to fill in any small gaps and dents. *Overfill a little bit for the best result.
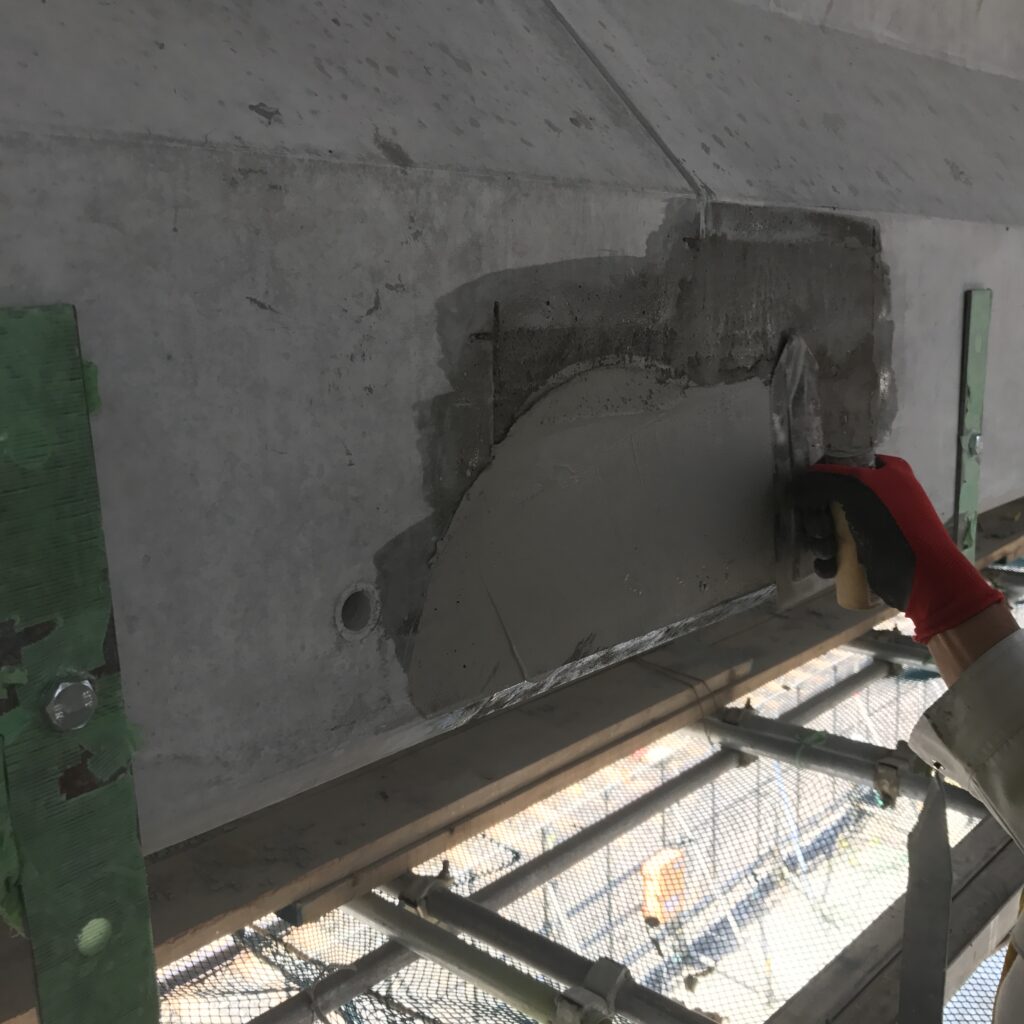
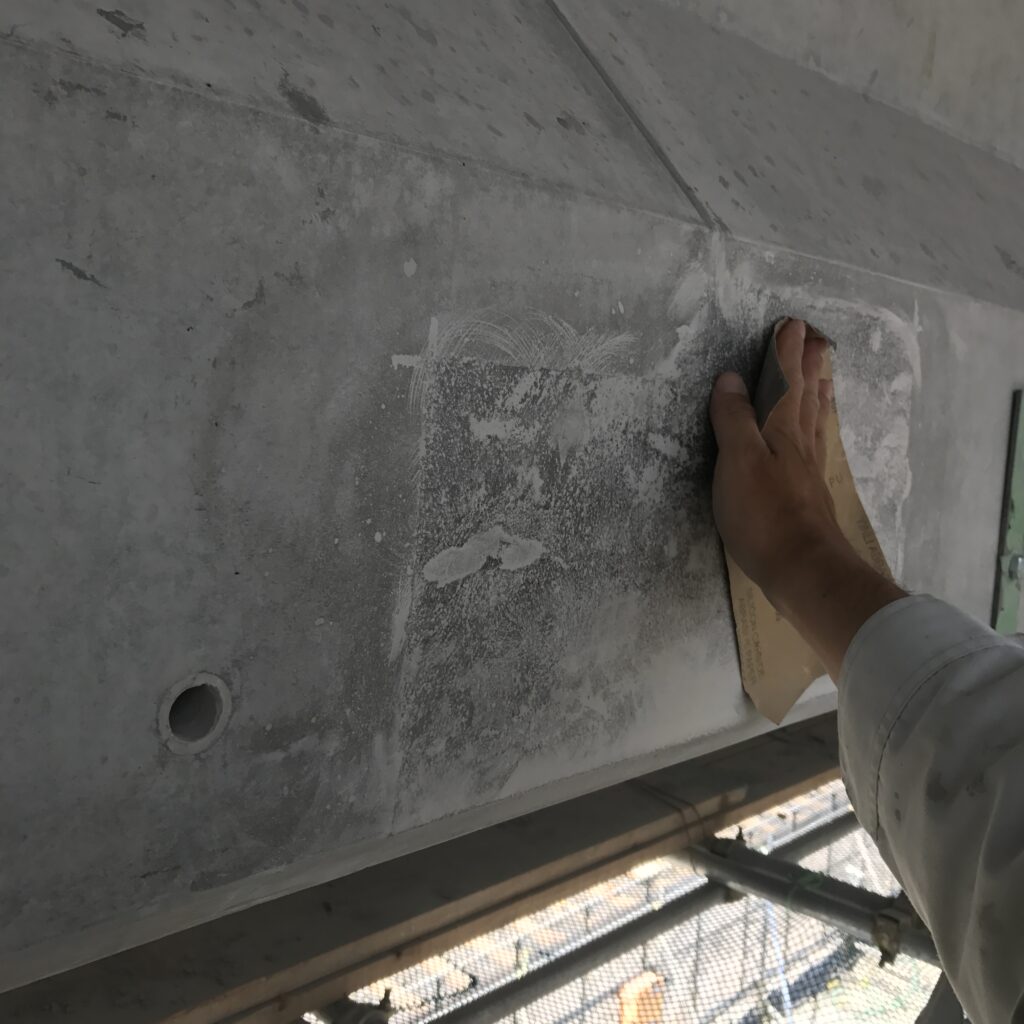
4, Repair material scraping
When Repair Resin is semi-dry, scrape off any excess materials with a trowel or a scraper. *In the photo, Level Grinding Wheel #80 is attached to a grinder.
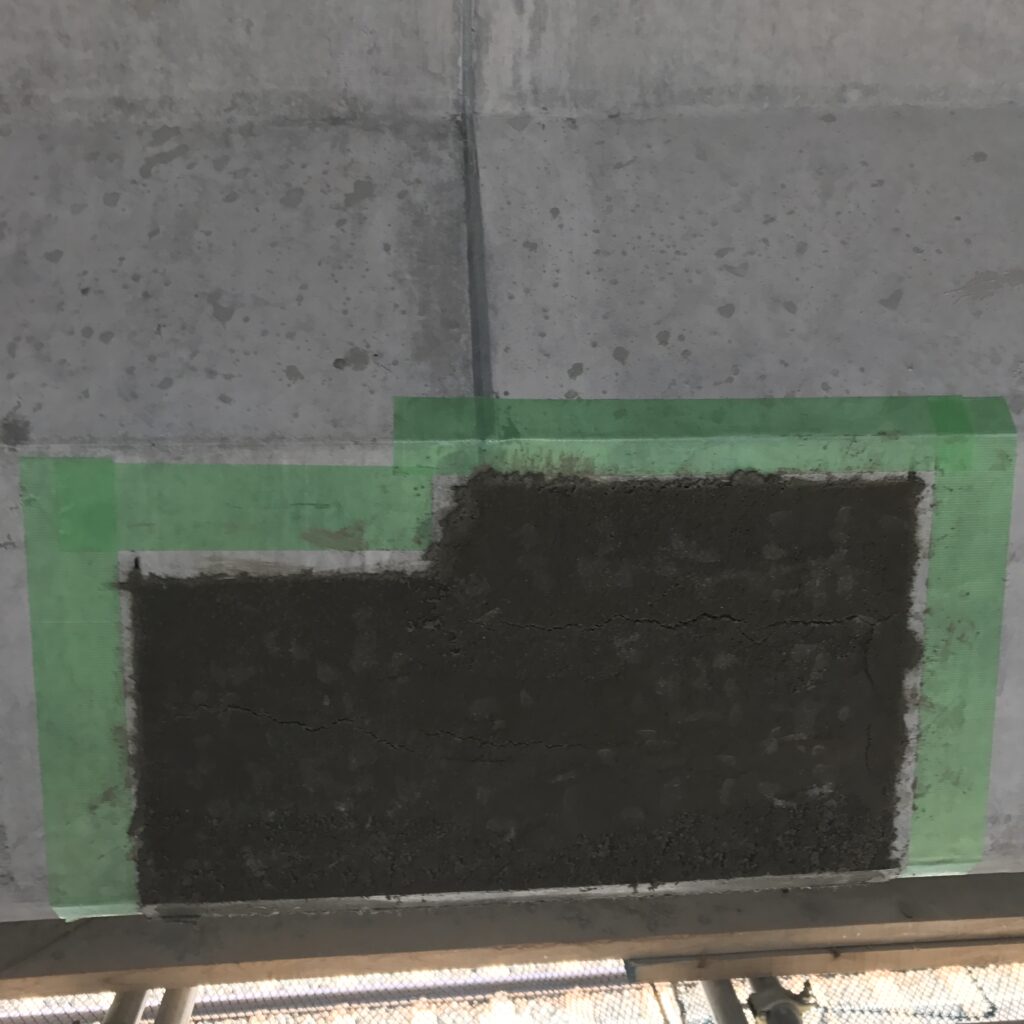
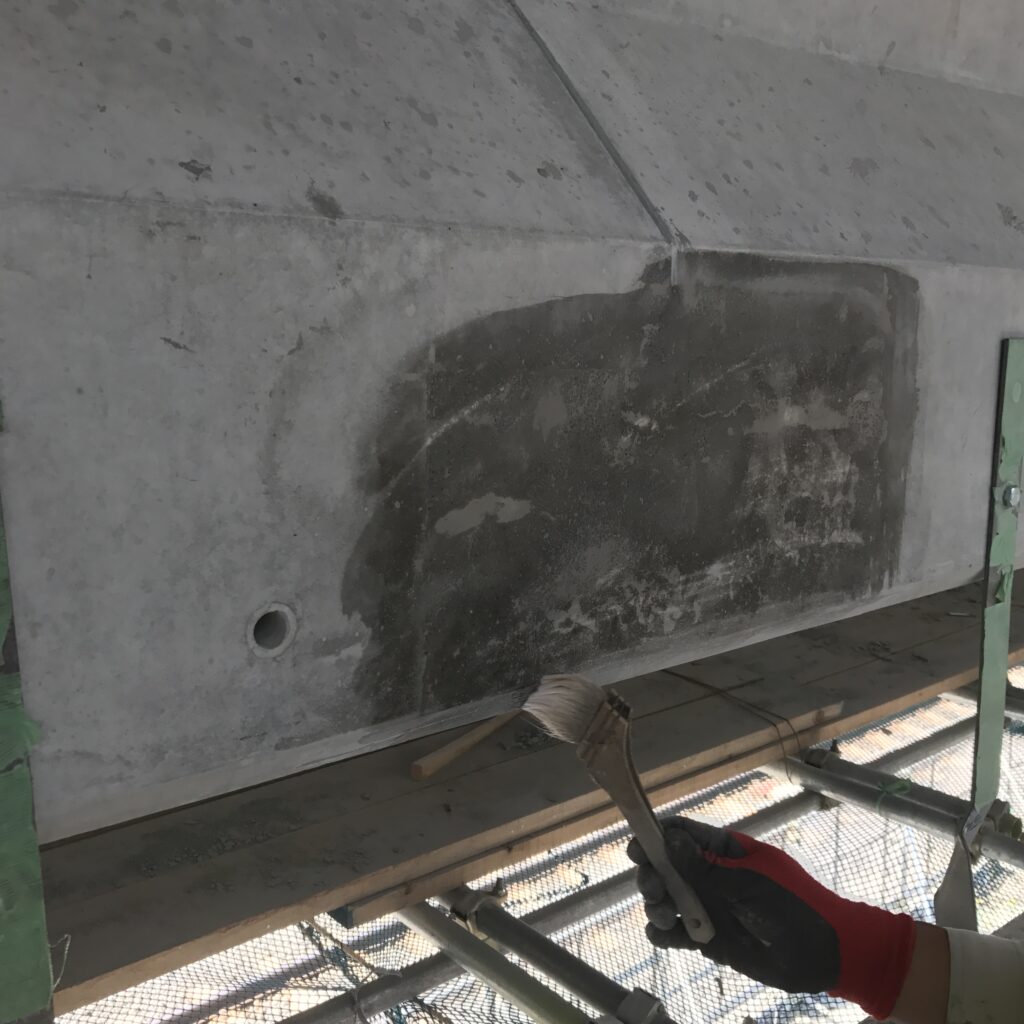
5, Applying primer
When the surface is thoroughly dry, apply the cement primer. *Apply just enough amount so it won’t drip.
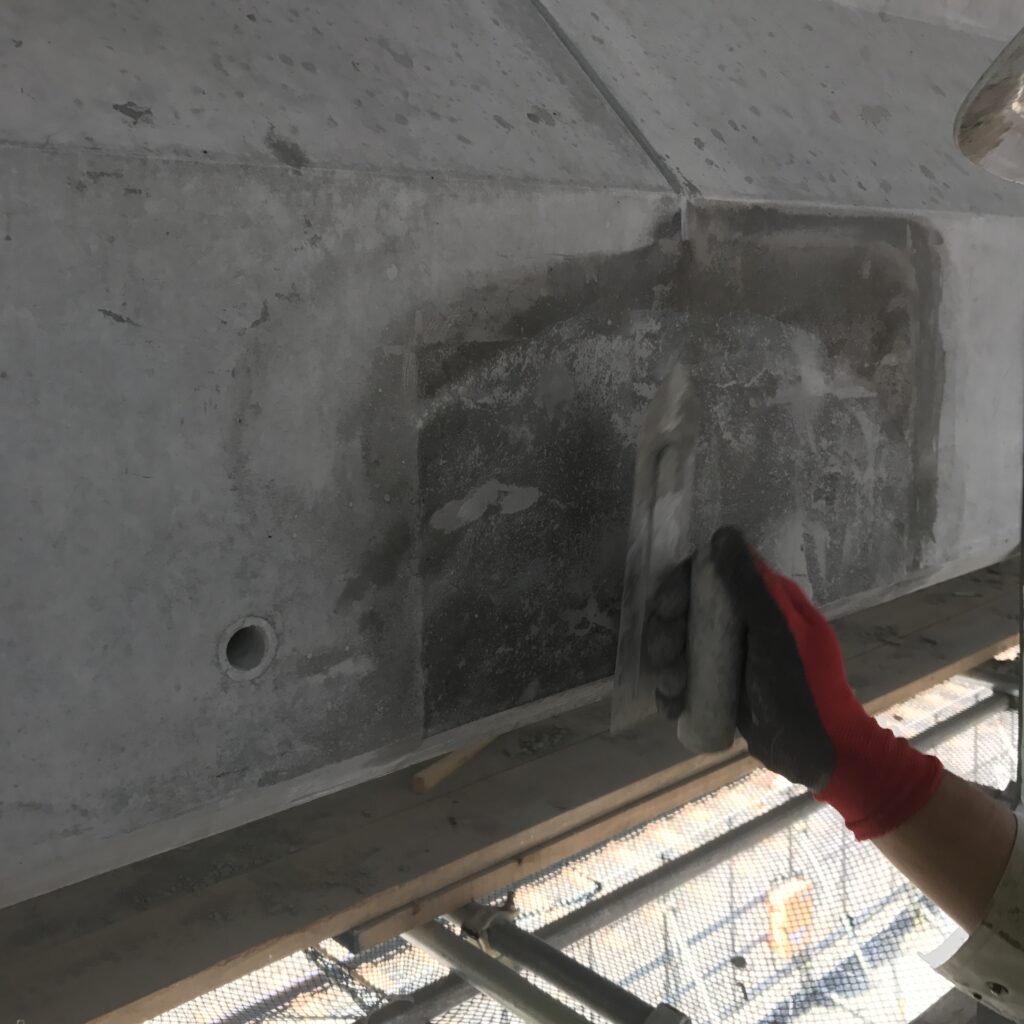
6, Lining material treatment
Apply a very thin layer of C Repair Lining, thin enough to see through the base. If the base is too dry and is hard to work on, apply the primer again.
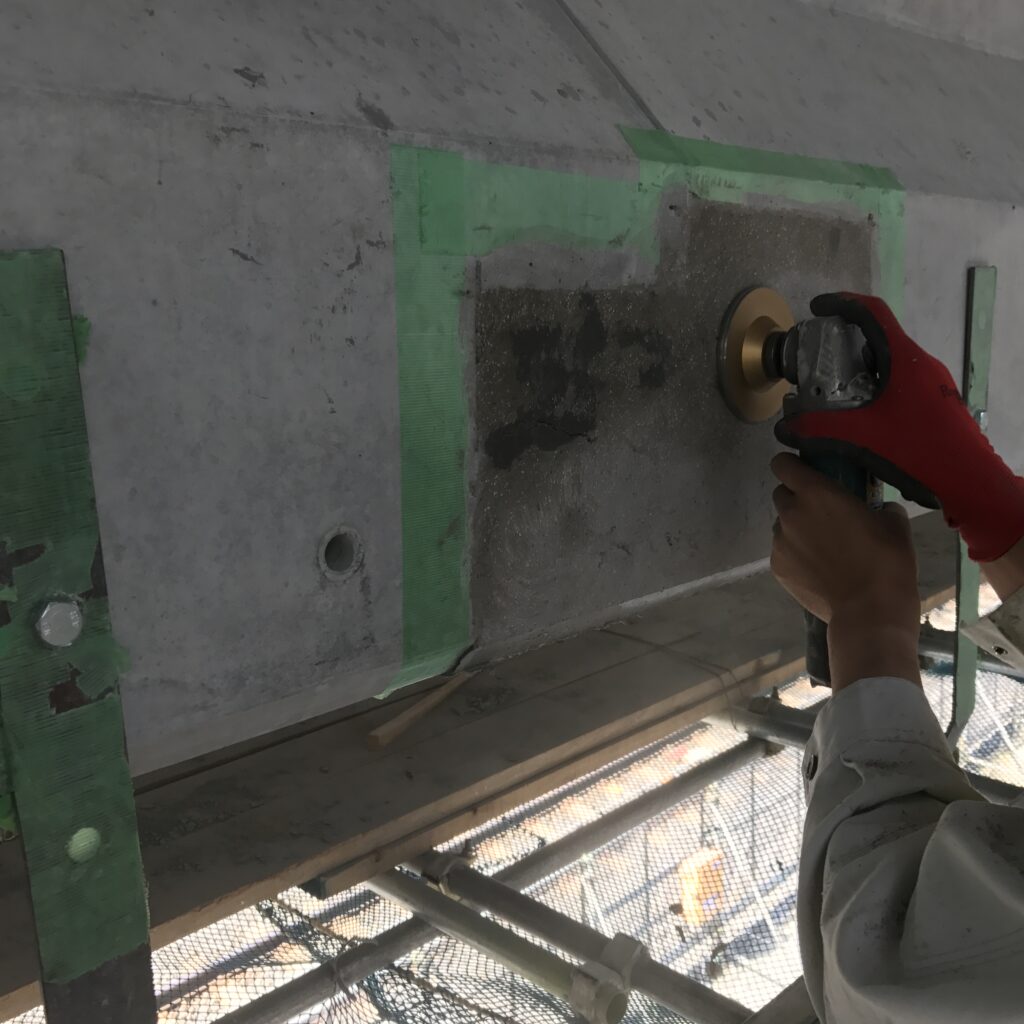
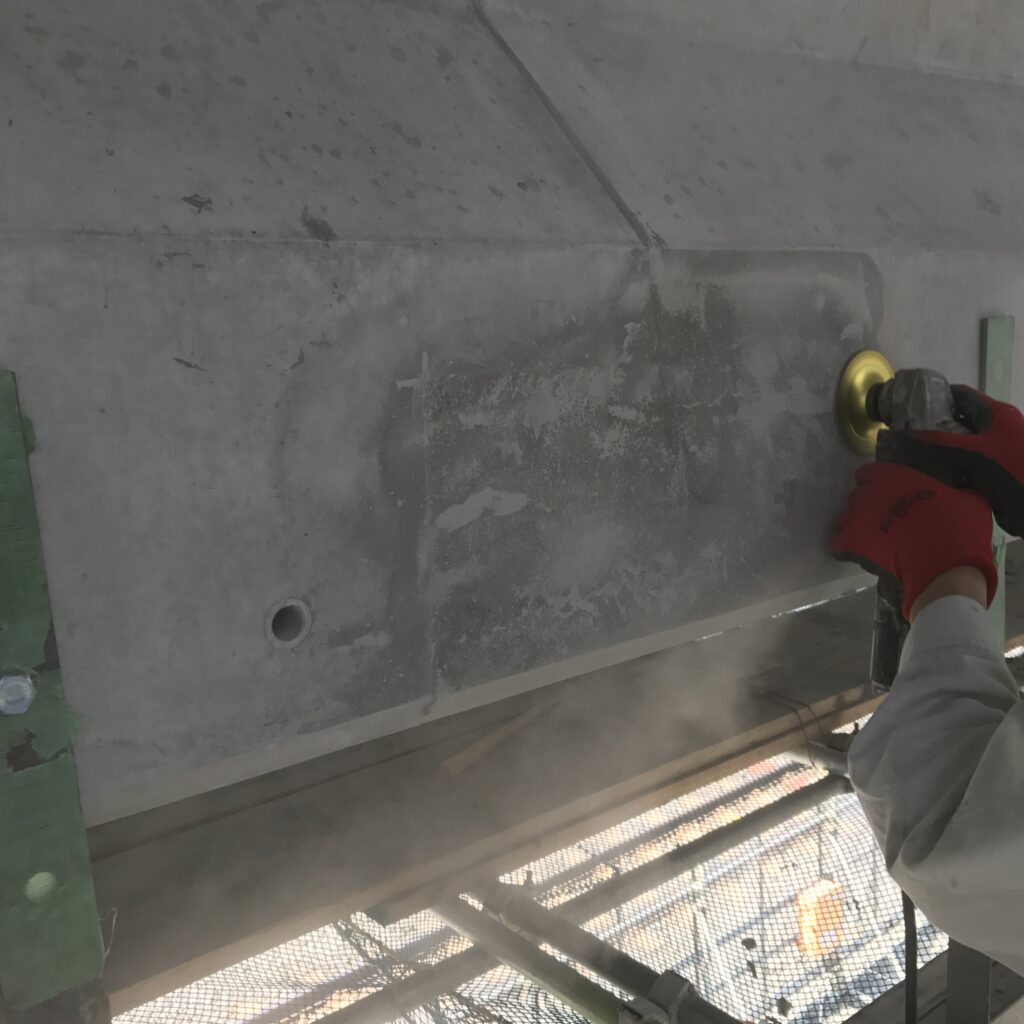
7, Sandpaper process
When the material is thoroughly dry, use a scraper or sandpaper to scrub off any trowel marks and dregs, and make the surface flat.
8, Spraying
Spray a small amount of C Repair Color at a time. Spray until it matches its surroundings, and the border is invisible.

9, Adding patterns
Add patterns to match its surroundings. The procedure is completed when it looks natural.

What to prepare
- Trowel(1~2mm)
- Metal trowel
- Bowl
- Scraper
- Waterproof sandpaper #600
- Wire brush
- Small bucket
- Brush
- Wiping cloth
- Wagner FLEXIO 570
- Air compressor
- Air hose
- Air gun
- Pattern Pad
- Gas torch
- Electric blower
- Grinder
- Level Grinding Wheel #36/#80
- Diamond cup wheel
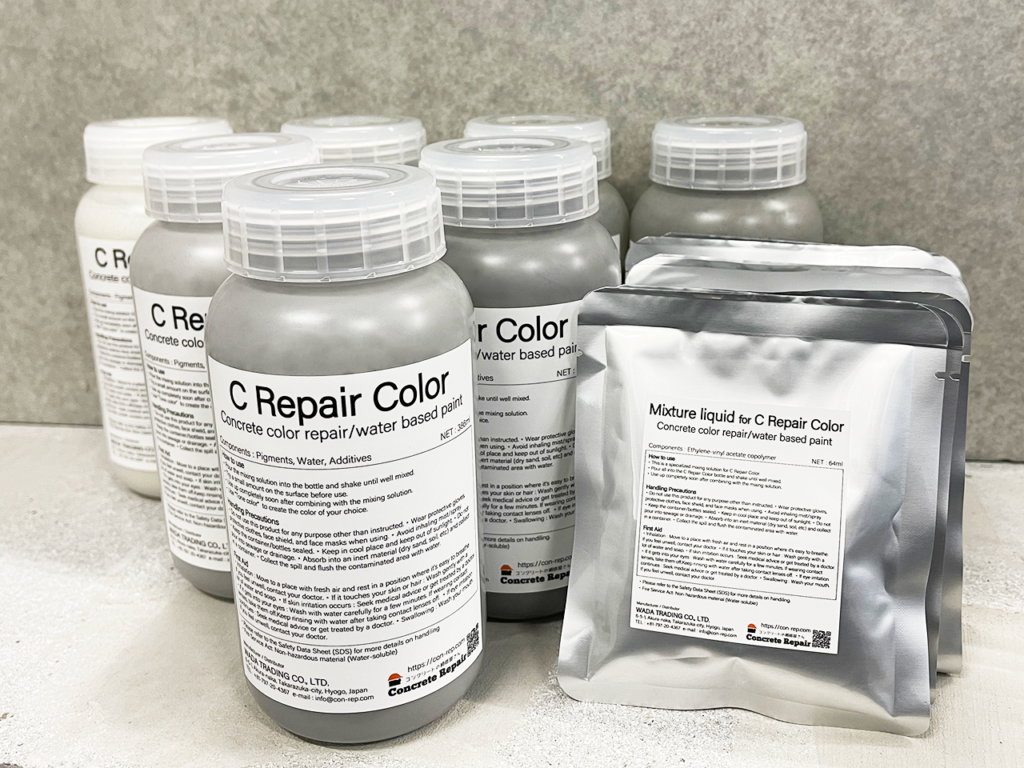
Materials to prepare
- Reapir Resin
- C Repair Lining
- C Repair Color
- Tone Color
- Cement primer(Royal W21 diluted about 20 times with water, etc,)
- Water
Notes
- All Repair Resin products are pre-mixed and only use water for kneading. Please note that the curing time and color may differ if any adhesives are mixed.
- Once it’s mixed with water, please use it all. Re-watering or kneading once curing has started may cause cracks and poor adhesion.
- Because it’s cement-based, it is subject to weathering and moisture absorption. Please store with care and use as soon as possible. (The 5kg inner bag is heat-sealed to improve shelf life. Please use the rubber band attached for sealing any leftover products.)
- When repairing, remove the excess unevenness of the surface beforehand with a hammer, chisel, scraper, etc., and clean it. If the mold releasing agent remains on the surface, it’ll peel off easily. Use a brush to scrub the surface and moisten it with water for the best results.
- Please be careful when handling a scraper or a metal trowel, as they may cut your hand.
- Please read the instructions and notes of C Repair Lining and C Repair Color.
- After adding the Mixing Liquid into C Repair Color, please use it all within 24 hours.
- Cover and protect the area where you don’t wish to spray paint beforehand.
- If it adheres to any unwanted area, wipe it off with a wet wiping cloth.
- Please make sure to mix C Repair Color thoroughly before use. If it’s not fully mixed, it may cause unevenness.
- Spray C Repair Color little at a time in thin layers. If you spray too thickly at once, it may drop, and the finished look will not look as good. Please repeat the process of “Spray → Dry → Spray” until the surface is fully covered.
- When adding patterns, tap lightly and inconsistently according to the surrounding patterns.
Updo Hairstyles
Magnificent items from you, man. I’ve be aware your stuff prior to and you are just extremely great. I actually like what you’ve obtained right here, certainly like what you’re saying and the way through which you are saying it. You make it entertaining and you still care for to stay it smart. I can not wait to read far more from you. This is actually a great website.
Fashion
Hiya, I’m really glad I’ve found this information. Nowadays bloggers publish only about gossips and internet and this is really irritating. A good website with exciting content, that is what I need. Thanks for keeping this website, I will be visiting it. Do you do newsletters? Can not find it.
Fashion Styles
I have noticed that in cameras, exceptional receptors help to concentrate automatically. Those kind of sensors connected with some video cameras change in in the area of contrast, while others start using a beam involving infra-red (IR) light, specifically in low lighting. Higher spec cameras oftentimes use a mixture of both techniques and will often have Face Priority AF where the camera can ‘See’ some sort of face while keeping your focus only on that. Many thanks for sharing your ideas on this blog site.